Mechanical seal failures are rarely “random.” In most cases, the seal is not the true problem—it is the first component that shows symptoms of a bigger system issue, such as dry running, misalignment, process contamination, unstable pressure/temperature, or incorrect support conditions.
The biggest mistake many plants make is replacing the seal without identifying why it failed. That leads to repeated failures, unplanned downtime, and rising maintenance costs.
This step-by-step guide shows how to perform a structured mechanical seal failure analysis, so you can identify the real root cause and prevent the next failure.
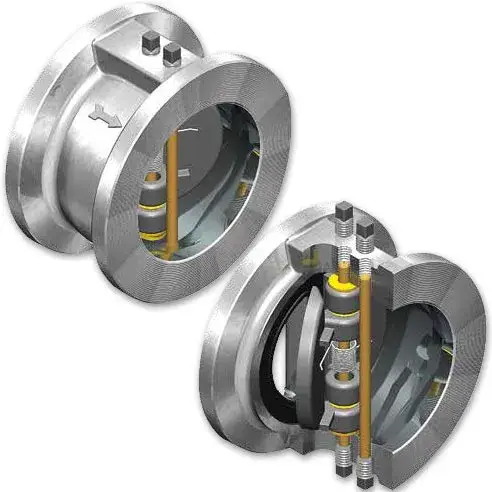
Image 1 — Step-by-Step Failure Analysis Workflow (Insert here)
ALT: Mechanical seal failure analysis workflow step by step
Step 1: Capture Symptoms and Context Before Disassembly
Before opening the seal chamber, collect the facts. Many root causes become obvious from operating context alone.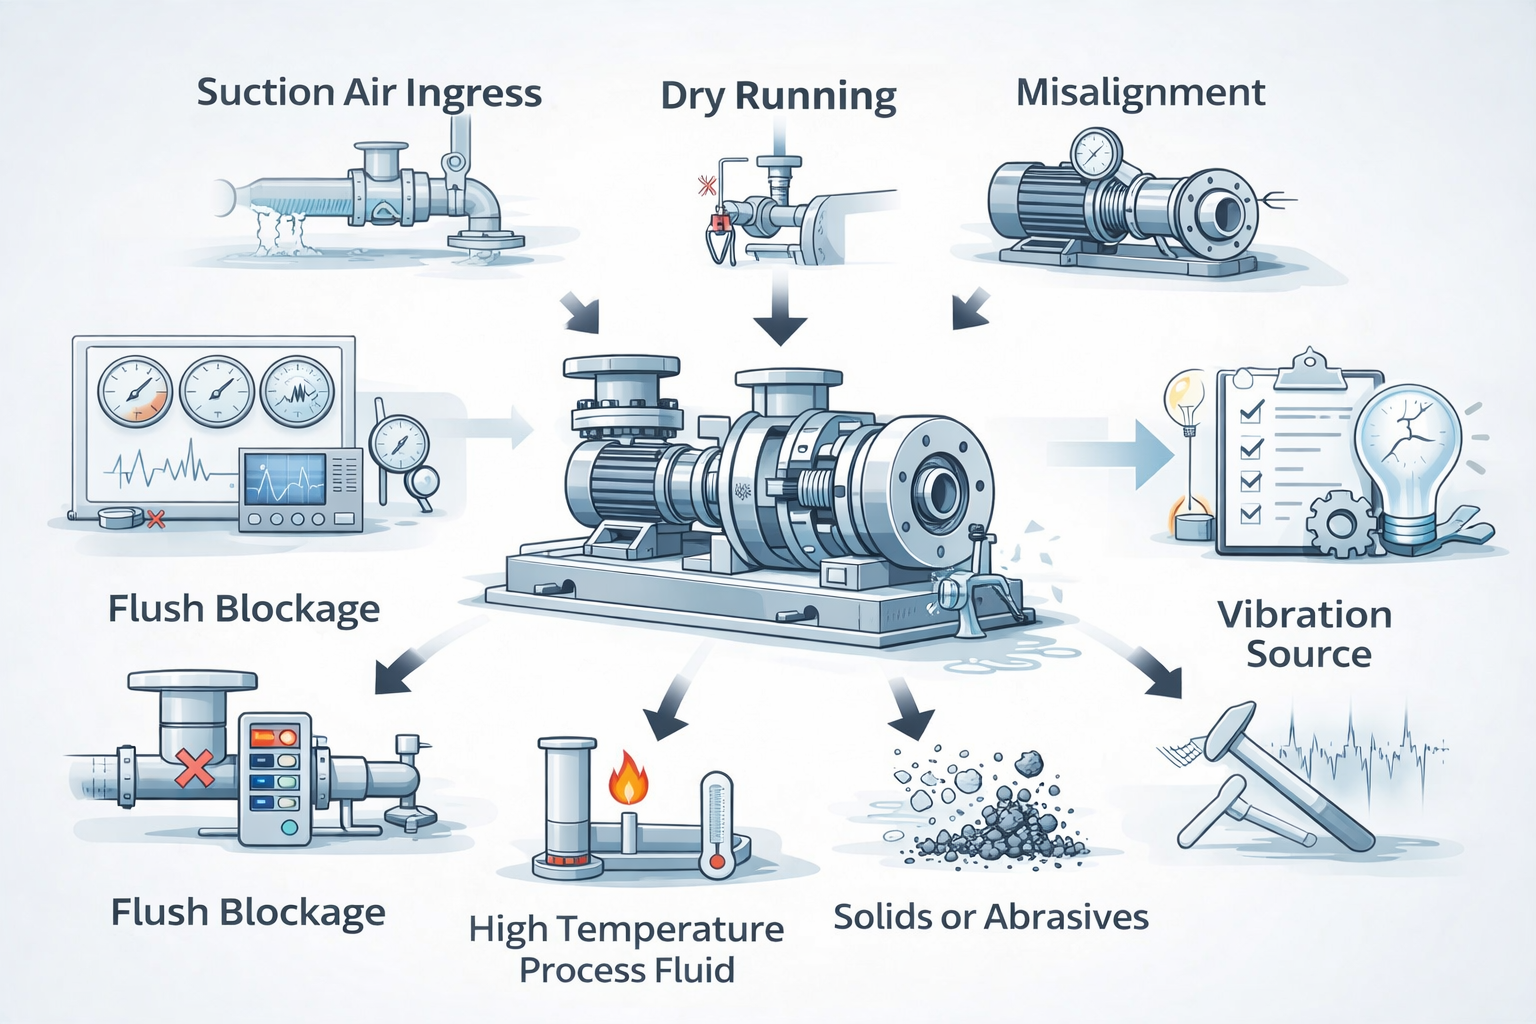
What to record
-
When did the failure occur: startup, steady operation, shutdown, or after a process change?
-
Was leakage sudden أو gradual?
-
Any abnormal noise, vibration, temperature rise, or motor load increase?
-
Any recent changes in process fluid: concentration, viscosity, solids, or temperature?
-
Any changes in seal support: flush line condition, cooling water flow, barrier/buffer pressure?
Why this matters
A seal that fails during startup is often linked to installation, alignment, or dry running.
A seal that fails after a process change often points to chemical compatibility, solids, flashing, or temperature issues.
Step 2: Identify the Failure Mode (What You See vs. Why It Happened)
A failure mode is the visible pattern of damage. It helps you narrow the search quickly.
Common mechanical seal failure modes
-
Progressive face wear → leakage increases over time
-
Thermal damage / heat checking → rapid leakage after overheating
-
Chipping or cracking → sudden leakage
-
Secondary seal failure (O-ring/bellows) → leakage around the gland or sleeve
-
Spring/drive problems → intermittent leakage, unstable sealing
-
Contamination or solids packing → overheating + leakage
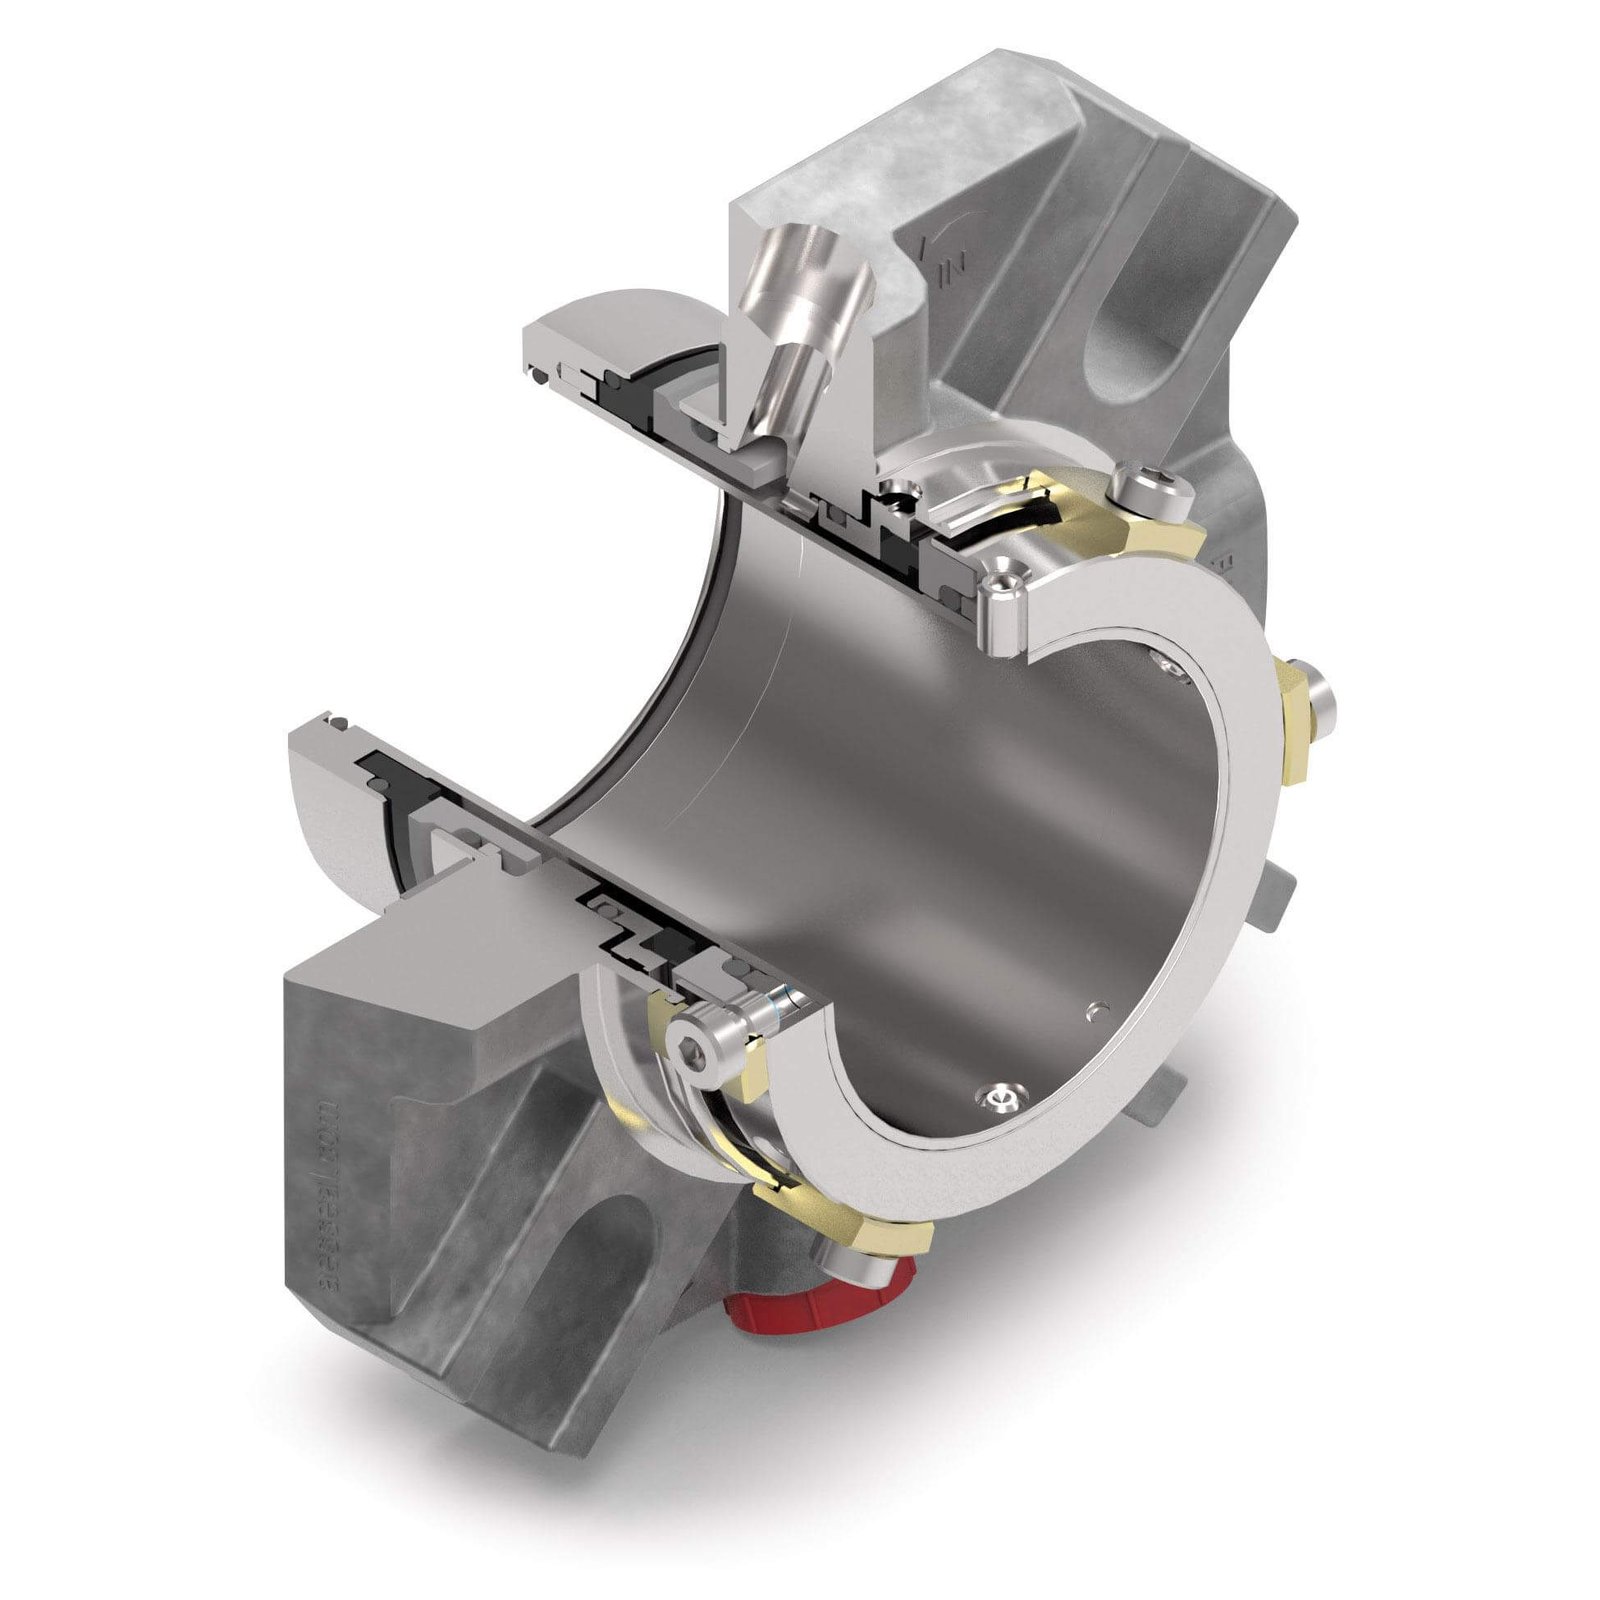
Image 2 — Typical Seal Face Damage Patterns (Insert here)
ALT: Common mechanical seal failure modes abrasive wear thermal cracking chipping
Step 3: Inspect the Seal Assembly Systematically (Use a Checklist)
Disassemble carefully. Keep parts in order and take photos. Do not clean everything immediately—deposits and marks are evidence.
A) Seal faces
Check for:
-
uneven wear pattern (often indicates misalignment or vibration)
-
discoloration or heat marks (often indicates dry running or flashing)
-
grooves or embedded particles (often indicates abrasives/solids)
B) Secondary seals (O-rings / bellows)
Look for:
-
hardening / cracking → temperature or aging
-
swelling / softening → chemical incompatibility
-
cuts / nicks → installation damage or sharp edges
C) Springs, drive pins, and hardware
Look for:
-
clogged springs (solids or product build-up)
-
corrosion (chemical attack or poor flushing)
-
worn drive features (loss of face loading stability)
D) Shaft sleeve and seal chamber
Check:
-
sleeve scoring (leak path)
-
corrosion pits
-
deposits or coking in the seal chamber
Step 4: Verify Installation-Related Root Causes
Early failures are frequently installation-related—especially when a seal fails soon after replacement.
High-probability installation causes
-
shaft runout not checked
-
misalignment not corrected
-
incorrect setting length / compression
-
seal faces contaminated during installation
-
uneven gland tightening or wrong gasket
-
piping strain pulling on the seal gland connections
If a new seal fails quickly, assume installation/alignment issues first, then move to materials and process causes.
Step 5: Check Operating Conditions (The Root Cause Is Often Here)
Even a perfectly installed seal can fail if the operating environment is unstable.
The most common operating condition triggers
1) Dry running / poor lubrication
-
pump not primed
-
low suction head or air ingestion
-
blocked flush line
-
low process fluid level
2) Solids and abrasives
-
slurry or dirty fluids
-
crystallization or polymerizing products
-
solids packing around springs and faces
3) High temperature and flashing
-
product vaporization at the seal faces
-
unstable fluid film and rapid wear
4) Pressure spikes and transients
-
rapid valve changes
-
frequent starts/stops
-
sudden process upsets
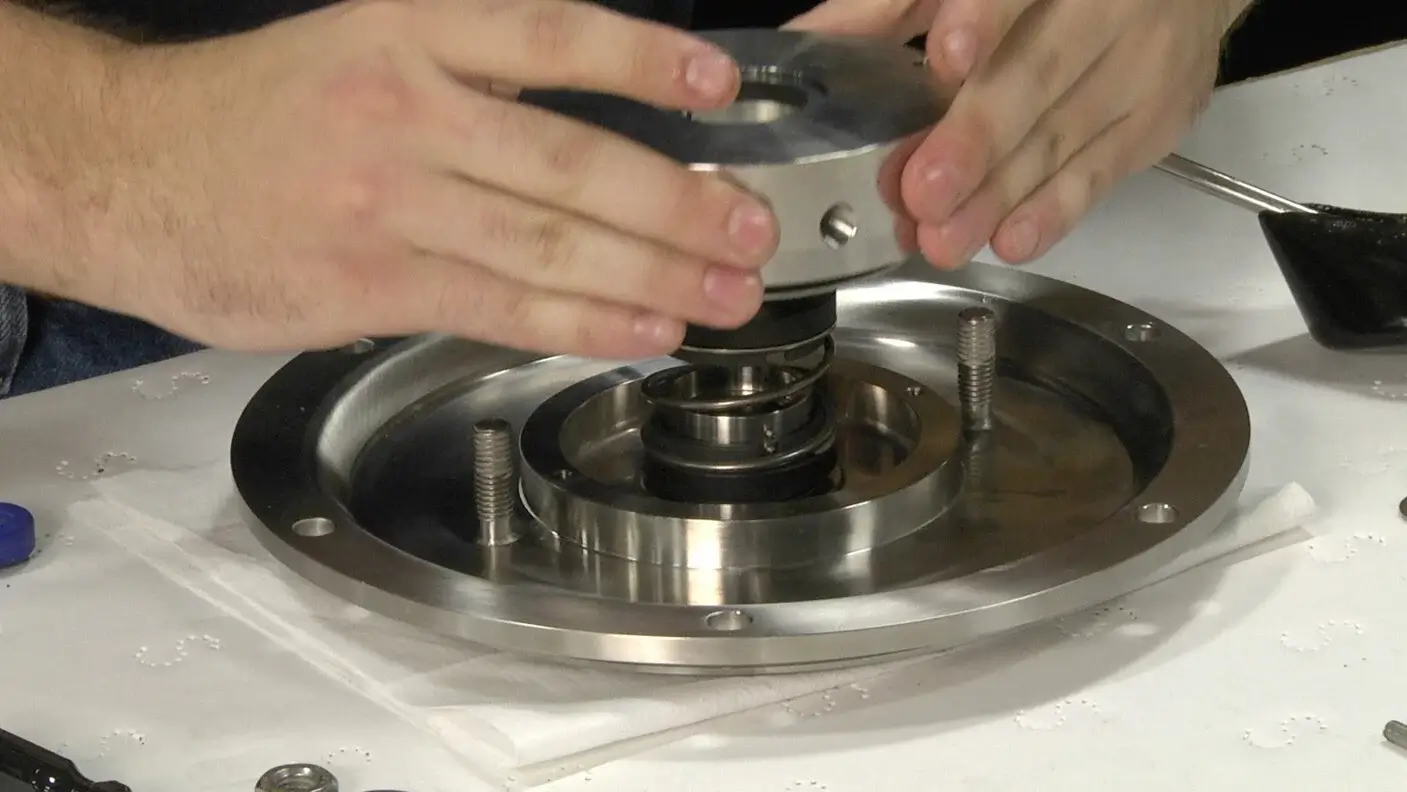
Image 3 — Pump System Root-Cause Zones (Insert here)
ALT: Pump system factors causing mechanical seal failure suction air misalignment vibration flush blockage
Step 6: Connect Evidence to Root Cause (Not Just Symptoms)
Use this rule:
Failure mode = what you see
Root cause = why it happened
Examples:
-
Face heat checking → dry running, insufficient cooling, flashing
-
Uneven wear → misalignment, shaft deflection, vibration
-
Swollen O-ring → chemical incompatibility
-
Springs clogged → solids contamination, poor flushing/support conditions
This step is where most teams fail—they stop at symptoms and never fix the system.
Step 7: Corrective Actions (Prevent Repeat Failures)
Once the root cause is clear, apply corrective actions that eliminate it.
Typical corrective actions
-
improve alignment and reduce runout
-
improve installation consistency (tools, procedure, cleanliness)
-
upgrade face and elastomer materials for chemical/temperature conditions
-
improve seal support conditions (stable flow, stable pressure, stable temperature)
-
reduce vibration sources (cavitation, bearing issues, piping strain)
-
standardize startup/shutdown practice to avoid dry running and thermal shock
الأسئلة الشائعة
What is the most common cause of mechanical seal failure?
In many industrial pumps, the most common causes are dry running, misalignment/runoutو unstable support conditions, rather than “seal quality.”
Why does a new seal fail quickly after replacement?
Because the original root cause was not corrected—installation factors, shaft issues, or operating conditions are still present.
Can I diagnose seal failure without disassembly?
You can narrow it down using leakage behavior, temperature, vibration, and process changes—but confirming the failure mode usually requires inspection.
الخاتمة
Mechanical seal failure analysis is not guesswork.
A structured approach—collecting symptoms, identifying failure modes, inspecting components, and checking operating conditions—helps you find the real root cause and prevent repeated failures.
If you want to reduce downtime and improve pump reliability, treat the seal as part of a system, not a standalone component.